Email newsletters are a powerful way to engage your audience, drive traffic to your website, and nurture leads. However, managing the entire newsletter process, from planning to scheduling to tracking performance, can quickly become overwhelming, especially if juggling multiple newsletters across different brands or websites.
That’s where ClickUp, the versatile project management platform, comes in to streamline your workflow and boost your productivity. This comprehensive guide will walk you through leveraging ClickUp’s features to manage your newsletters efficiently.
Why Use ClickUp for Newsletter Management?
Before diving into the step-by-step process, let’s highlight some key benefits of using ClickUp:
- Centralize all your newsletter tasks, content, schedules, and analytics in one place
- Collaborate seamlessly with your team on newsletter creation and review
- Create reusable newsletter templates to maintain consistency
- Automate repetitive steps in your workflow to save time
- Integrate with your email service provider to keep everything connected
Now, let’s get into the details of managing newsletters with ClickUp.
Step 1: Set Up Your ClickUp Workspace for Newsletters
The first step is to create a dedicated Space in ClickUp for your newsletter management. You can call it something like “Email Newsletters.” Within that Space:
- Create a List for each of your brands/websites that send out newsletters
- Use Custom Fields to add key info like newsletter send date, audience segment, subject line, etc.
- Build a template task with subtasks for your typical newsletter process (content draft, review, scheduling, etc.)
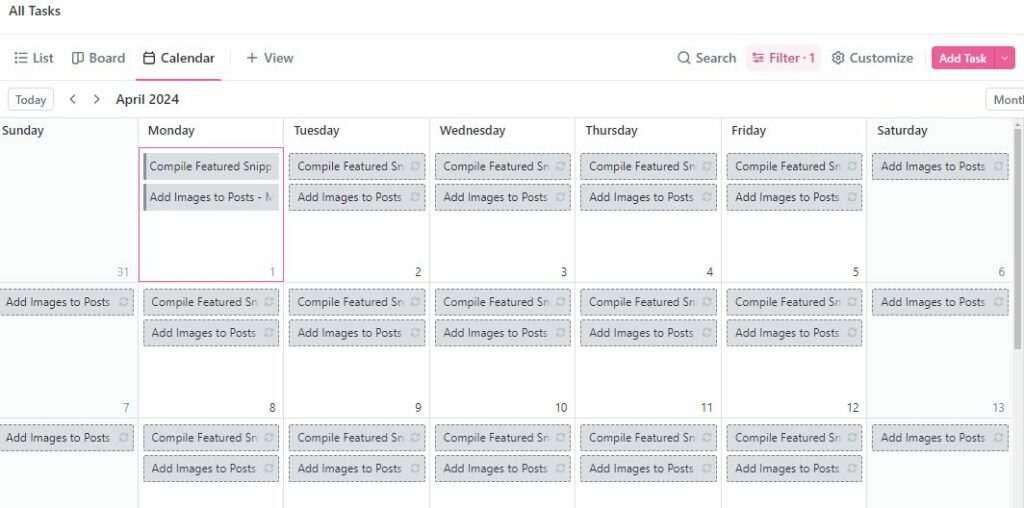
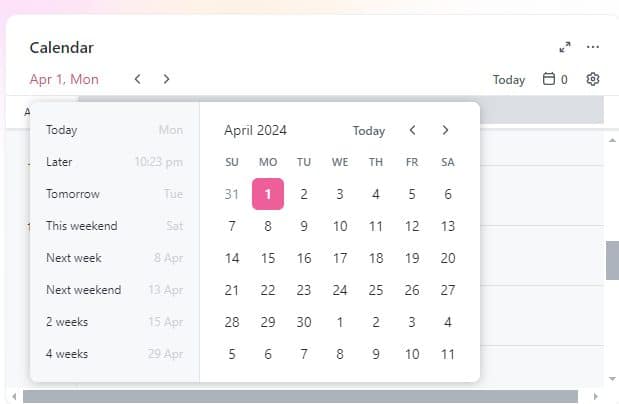
- Set up different Views, like a Calendar view, to see upcoming send dates
Having this structure in place will keep your newsletter operation organized as you scale.
Step 2: Plan Your Newsletter Content

Create a task in the relevant brand List for each newsletter you need to send. Name the task clearly, like “Oct 2022 Newsletter for XYZ.com”.
Within the task description:
- Use a three-column structure to plan out your newsletter content and links
- Add any meta content and scheduling info like subject line, preview text, UTM parameters
- Attach any images or graphics that will be included
- Assign the relevant team member to draft the newsletter copy
ClickUp Docs is a great way to collaborate on the newsletter copy. You can create the Doc within the task and tag team members to provide feedback. The commenting feature allows you to thread discussions and resolve them when addressed.
See Related: VistaSocial Review: Is This The Ultimate Social Media Scheduler?
Step 3: Build Your Newsletter in Your ESP
Once the newsletter copy and assets are finalized, it’s time to actually build it out in your email service provider. While you could paste the final copy into the task description, it’s best to link it to the ESP to keep the task focused.
Here’s how that process could look:
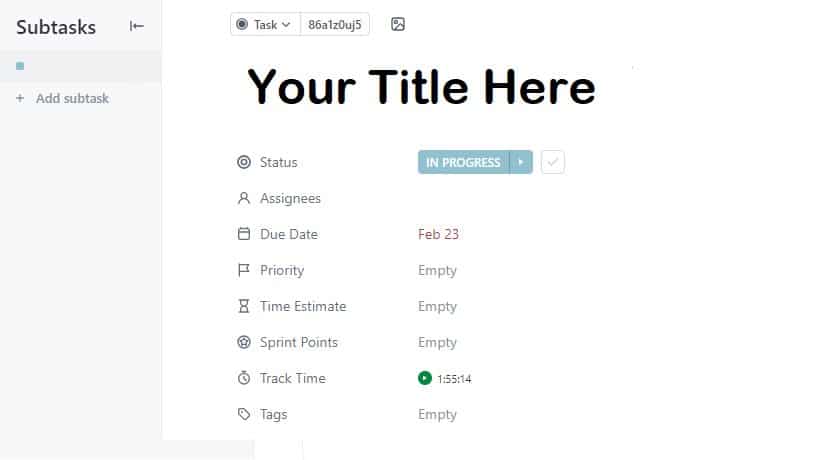
- Change the task status to “In Progress”
- Click the link to your ESP and create a new email campaign
- Copy over the subject line, preview text and body content from the ClickUp task
- Format the newsletter, insert graphics, customize the greeting and signature
- Send a test email and do a final check for any formatting or copy issues
- Schedule the newsletter (or send immediately) and move ClickUp task to the “Sent” status
The ClickUp Gmail extension allows you to create tasks directly from your newsletters for post-send action items.
Step 4: Track Performance and Iterate
Your work isn’t done once you hit send! Be sure to go back to the original ClickUp task for that newsletter and:
- Paste in a link to the final newsletter for reference
- Attach a screenshot of the email
- Add performance metrics like open rate, click rate, and any notable results (sales, replies, etc) via Custom Fields
This will allow you to track results over time and spot trends.
After a few sends, analyze what’s working and what’s not. Use those insights to iterate and optimize future newsletters. Maybe top-performing subject lines inform your guidelines. Or a template tweak improves your click rates. Continuously improve your newsletters each month.
See Related: Google’s HCU: A Comprehensive Guide to Understanding Google’s Hardware Compute Unit
Power Up Your Process with Automation
Managing newsletters with ClickUp is already a streamlined process, but you can take it to the next level with simple automation! Some ideas:
- Set a recurring task trigger to create your newsletter tasks each month
- Move tasks to the next status when subtasks are checked off
- Send a notification to the team when a newsletter task is moved to “Sent”
- Update newsletter performance Custom Fields via ClickUp’s native integrations
Here’s a full summary table of ideas and their difficulty level:
| Automation Idea | Description | Estimated Time Saved Per Month | Difficulty Level |
|---|---|---|---|
| Recurring Newsletter Tasks | Set up recurring tasks for weekly/monthly newsletter creation, ensuring you never miss a deadline. | 2-4 hours | Easy |
| Automated Status Changes | Configure custom automations to change the status of tasks as you progress through your newsletter workflow (e.g. “Draft” to “Ready for Review”). | 1-2 hours | Intermediate |
| Notification Reminders | Get notified when it’s time to start working on your newsletter, keeping you on schedule. Customize reminders based on your preferences. | 30 mins – 1 hour | Easy |
| Template & Checklist Integration | Utilize templates and checklists to streamline the newsletter creation process, ensuring consistency and completeness. | 2-4 hours | Intermediate |
| Content Approval Workflow | Implement an approval process for newsletter content, with automated task assignments and notifications for reviewers. | 1-2 hours | Advanced |
See Related: How to Write Content for a Search Engine: A Comprehensive SEO Guide
Integrating ClickUp + Your ESP
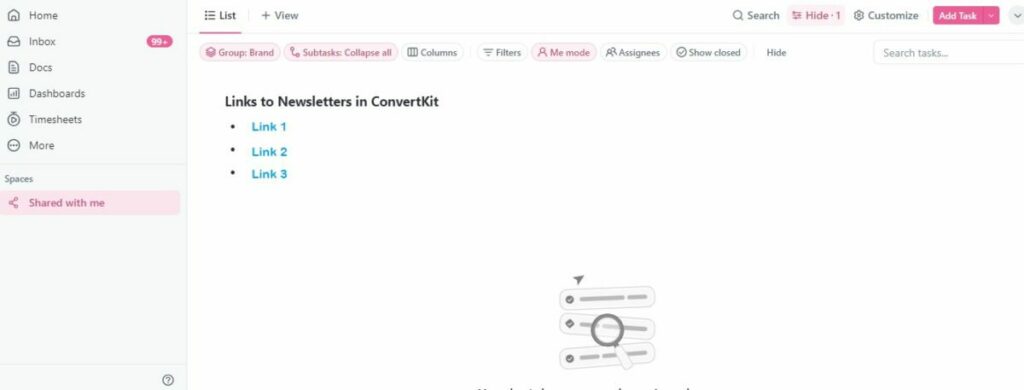
For the ultimate connected workflow, integrate ClickUp with your email service provider. ClickUp offers native integrations with popular ESPs like Mailchimp, Constant Contact, and ConvertKit.
This allows you to do things like:
- Create ClickUp tasks directly from your ESP
- Attach sent newsletters to existing ClickUp tasks
- Sync newsletter metrics and subscriber info with Custom Fields
- Trigger sequences based on ClickUp task completions
Integrating the two allows your tools to talk to each other and cuts out the copy/paste work between them. Everything stays up-to-date and in sync.
Managing Multiple Newsletters at Scale
What if you have multiple newsletters across different websites and audiences? ClickUp makes it easy to organize them all without losing any efficiency. Here are some tips:
- Use separate Lists in ClickUp for each brand or newsletter type
- Color code your newsletter tasks by audience or funnel stage for easy reference
- Create Saved Views to slice and dice your newsletters by type, date, etc.
- Leverage Workload view to balance newsletter assignments across the team
- Build a central Docs Database to house newsletter knowledge, guidelines, best practices
With this solid structure in place and clear processes documented, you can expand your newsletter operation smoothly while keeping everything under control.
Tips for Newsletter Management Success
We’ve covered a lot about how to manage newsletters with ClickUp, but here are a few final tips for success:
- Create an editorial calendar view to see all your newsletters over the next 3-6 months
- Delegate different aspects like drafting, proofing and sending to avoid bottlenecks
- Always QA test your newsletters across devices before scheduling or sending
- Keep an eye on email deliverability rates and subscriber health metrics
- Allow at least 1-2 weeks for each newsletter to go from concept to scheduled
- Adjust plans as needed if a newsletter comes up short on content or needs to shift dates
- Cross-pollinate content and copy between newsletters when it makes sense
- Repurpose newsletter content for your blog, social media and other channels
- Review your process every 6 months and find ways to simplify or further automate
With these tips and the power of ClickUp in your toolkit, you’ll be well-equipped to handle newsletter management efficiently and effectively.
Related Resources: