As an experienced writer and blogger, I’ve found various ways to optimize website content for search engines. One crucial aspect of optimizing your website is renaming image files in WordPress. In this how-to tutorial, I’ll walk you through using the Phoenix Media Rename Plugin in WordPress to make your image files SEO-friendly.
Getting Started with Phoenix Media Rename Plugin
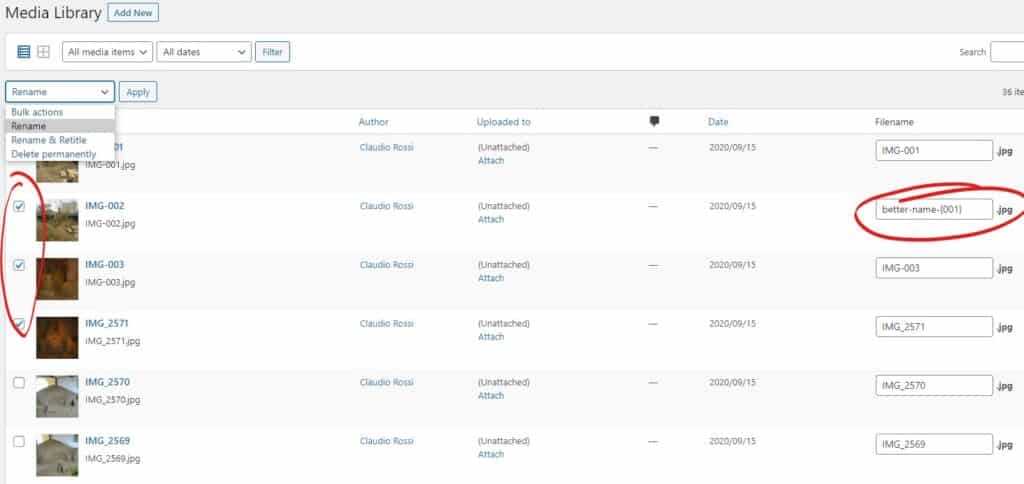
The Phoenix Media Rename Plugin is a powerful tool that allows you to rename and optimize image files directly within the WordPress dashboard. To get started, you’ll need to install and activate the plugin. Once activated, the plugin will be embedded in your media library.
Locating Images to Rename

Chances are you won’t be manually searching your media library to locate files to rename. Instead, you’ll likely receive a list of URLs that need to be updated. You can use the search feature within the media library to locate images that need renaming. For example, searching for “image-file-name.jpg” will display all the images that haven’t been renamed for SEO purposes.
Renaming Image Files for SEO Optimization
After locating an image that needs renaming, follow these steps:
- Identify the image’s subject: To determine the best file name, you may need to check the context in which the image is used. You can do this by opening the article and locating the image within the content.
- Rename the file: Click on the image in the media library to open its details page. Change the file name to more SEO-friendly, and click “Update.”
- Example: “Runyon Canyon Park”
- Adding Alt Text: While renaming the image, add appropriate alt text to optimize the image for search engines.
- Example: “Big Sur Bridge, California Ocean Coastline”
- Updating the file: If the update process gets stuck, refresh your browser and click “Update” again. This should save your changes and complete the update.
- Double-check your changes: Confirm that the new file name and alt text have been saved successfully.
See Related: Validity of Webpage for SEO
Additional Tips for Using Phoenix Media Rename Plugin

- Always rename the file before updating the alt text, title, and description. If the update process gets stuck, you may lose any changes made to those fields.
- If you encounter any issues, don’t hesitate to refresh your browser and try updating again.
- Ensure you add proper title, alt text, description, and captions to your images as applicable.
By following this guide on using the Phoenix Media Rename Plugin in WordPress, you’ll be well on your way to optimizing your image files for SEO. Don’t hesitate to reach out if you have any questions or need further assistance. Happy optimizing!
Related Resources: